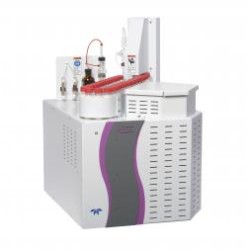
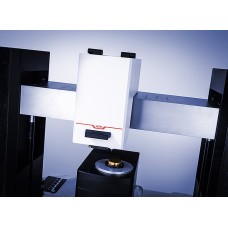
Nano Tribometer:
NTR3
Explore the fascinating domain of micro- and nanotribology
The NTR³ nano tribometer is specifically designed to investigate surface interaction at extremely low contact pressure, especially where soft materials are of interest. This instrument allows a significant contact area to be investigated while maintaining measurement accuracy at very low force and displacement ranges.
NTR³ combines the resolution of an atomic force microscope (AFM) with the stability, robustness, and ease-of-use of a pin-on-disk tribometer.
Key Features
Minimize force measurement error caused by torsional deformation with the unique dual quad-beam force cantilever
When measuring with low friction forces on a sample surface with high roughness or inclination, a normal spring cantilever (like those used by an AFM) may be easily twisted out of shape by the sample topography. This twist or torsion of the cantilever brings non-negligible errors in the friction measurement. The unique design of the dual quad-beam cantilever only allows the elastic deformation in normal and tangential directions. It strictly prevents any torsional deformation and therefore eliminates the measurement errors this would bring.
Ensure accurate normal and friction force measurement with independent high-resolution capacitive sensors
In tribology testing, it is very important to measure the normal and friction force independently so that the force change in one direction doesn’t influence the other. NTR³ is equipped with two separate high-resolution capacitive sensors. Combined with the unique dual quad-beam cantilever, the capacitive sensors ensure a decoupled and precise measurement of normal and friction forces.
Precise control of the normal force creates optimum conditions for tribology testing
Precise and stable control of the normal force is essential for tribology testing, especially under difficult conditions, e.g. where the desired normal force is extremely low and the sample surface topography complicated. The piezo actuator integrated in NTR³ reads the normal force measured by the sensor in real-time and adjusts its position instantly to keep the normal force stable. Thanks to the precise and fast feedback control by the piezo actuator, stepwise changes to normal force control are also possible within one measurement.
3 modes of sample movement provide meaningful results
Friction and wear are measured when there is a relative movement. It is therefore essential to be able to precisely control the trajectory of the sample movement against the static partner in order to get meaningful and repeatable results. All rotating and linear modules of NTR³ are equipped with both actuators and positional sensors so that the movement can be precisely performed by real-time feedback loop. In total 3 movement modes are possible: single-direction rotating, angular reciprocating, and linear reciprocating.
Observe the sample surface with the integrated video microscope
The video microscope is a useful add-on option for NTR³. The distance between the static partner (e.g. testing ball or pin) and the video microscope is precisely calibrated so that the user can easily switch the position of the sample. Furthermore, the user can pinpoint the desired testing position before and observe the wear track after the measurement.
Technical specifications :
| Normal force range | 5 μN to 1000 mN* |
| Normal force resolution | 0.003 μN* |
| Friction force range | 5 μN to 1000 mN* |
| Friction force resolution | 0.006 μN* |
| Rotating speed | 1 rpm to 200 rpm |
| Track radius | 100 um to 20 mm |
| Angular reciprocating angle | ±10° to ±150° |
| Angular resolution | 0.1° |
| Linear stroke length | Up to 5 mm** |
| Max. linear speed | Up to 26.6 mm/s** |
| Linear frequency | 0.01 Hz to 10 Hz** |
* Normal load and friction load specifications depend on the choices of different cantilevers (high resolution, standard, and high load cantilevers)
** Linear reciprocating movement specifications depend on the choice of different linear stages (2 mm and 5 mm ranges)


