Metallurgical Consumables
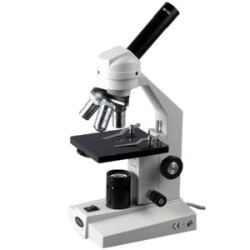
A metallurgical assay is a compositional analysis of an ore, metal, or alloy Some assay methods are suitable for raw materials; others are more appropriate for finished goods. Raw precious metals (bullion) are assayed by an assay office. Silver is assayed by titration, gold by cupellation and platinum by inductively coupled plasma optical emission spectrometry (ICP OES).[1][2] Precious metal items of art or jewelry are frequently hallmarked (depending upon the requirements of the laws of either the place of manufacture or the place of import). Where required to be hallmarked, semi-finished precious metal items of art or jewelry pass through the official testing channels where they are analyzed or assayed for precious metal content. While different nations permit a variety of legally acceptable finenesses, the assayer is actually testing to determine that the fineness of the product conforms with the statement or claim of fineness that the maker has claimed (usually by stamping a number such as 750 for 18k gold) on the item. In the past the assay was conducted by using the touchstone method but currently (most often) it is done using X-ray fluorescence (XRF). XRF is used because this method is more exacting than the touchstone test. The most exact method of assay is known as fire assay or cupellation. This method is better suited for the assay of bullion and gold stocks rather than works or art or jewelry because it is a completely destructive method. Metallography is the study of the physical structure and components of metals, typically using microscopy. Ceramic and polymeric materials may also be prepared using metallographic techniques, hence the terms ceramography, plastography and, collectively, materialography. The surface of a metallographic specimen is prepared by various methods of grinding, polishing, and etching. After preparation, it is often analyzed using optical or electron microscopy. Using only metallographic techniques, a skilled technician can identify alloys and predict material properties. Mechanical preparation is the most common preparation method. Successively finer abrasive particles are used to remove material from the sample surface until the desired surface quality is achieved. Many different machines are available for doing this grinding and polishing, which are able to meet different demands for quality, capacity, and reproducibility. A systematic preparation method is the easiest way to achieve the true structure. Sample preparation must therefore pursue rules which are suitable for most materials. Different materials with similar properties (hardness and ductility) will respond alike and thus require the same consumables during preparation. Metallographic specimens are typically "mounted" using a hot compression thermosetting resin. In the past, phenolic thermosetting resins have been used, but modern epoxy is becoming more popular because reduced shrinkage during curing results in a better mount with superior edge retention. A typical mounting cycle will compress the specimen and mounting media to 4,000 psi (28 MPa) and heat to a temperature of 350 °F (177 °C). When specimens are very sensitive to temperature, "cold mounts" may be made with a two-part epoxy resin. Mounting a specimen provides a safe, standardized, and ergonomic way by which to hold a sample during the grinding and polishing operations. A macro etched copper disc After mounting, the specimen is wet ground to reveal the surface of the metal. The specimen is successively ground with finer and finer abrasive media. Silicon carbide abrasive paper was the first method of grinding and is still used today. Many metallographers, however, prefer to use a diamond grit suspension which is dosed onto a reusable fabric pad throughout the polishing process. Diamond grit in suspension might start at 9 micrometres and finish at one micrometre. Generally, polishing with diamond suspension gives finer results than using silicon carbide papers (SiC papers), especially with revealing porosity, which silicon carbide paper sometimes "smear" over. After grinding the specimen, polishing is performed. Typically, a specimen is polished with a slurry of alumina, silica, or diamond on a napless cloth to produce a scratch-free mirror finish, free from smear, drag, or pull-outs and with minimal deformation remaining from the preparation process. After polishing, certain microstructural constituents can be seen with the microscope, e.g., inclusions and nitrides. If the crystal structure is non-cubic (e.g., a metal with a hexagonal-closed packed crystal structure, such as Ti or Zr) the microstructure can be revealed without etching using crossed polarized light (light microscopy). Otherwise, the microstructural constituents of the specimen are revealed by using a suitable chemical or electrolytic etchant.


